Introduction
Burp suite has many useful features in store for us, even right after starting up. As a user of the community version of burp, your options here will be somewhat limited but still useful in debugging our project. We will start with one of the few free options available to us.
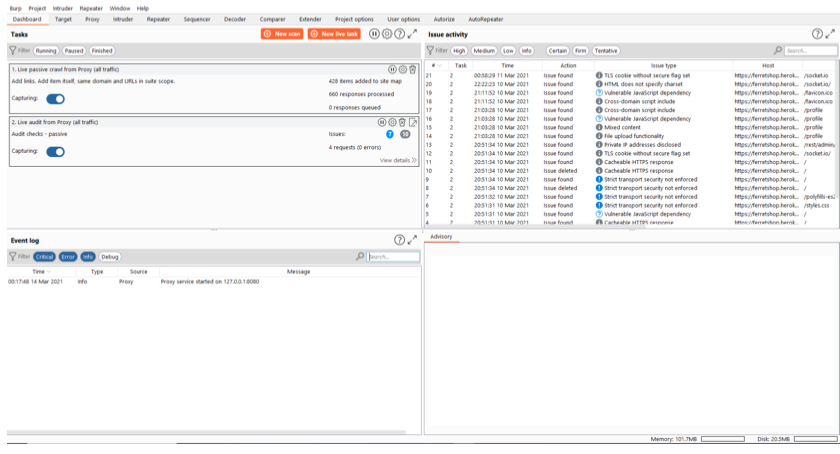
Event log
This will display any event occuring in burp suite while we run it, this can range from errors to information to things we print out with our custom written extensions.
If you ever have issues intercepting traffic or decoding it, this is the first place i would look.
Scans
We can diffirentiate between 3 different types of scans here, all 3 have their unique properties which we will go over in detail.
Scan details Scan types – Crawl
Crawling a website allows burp to automatically look for any URL or link it finds on the webpage that you give it and then attempt to surf there and it will repeat the same actions. This can take one or multiple URLs as a starting point and go from there. Please note that this does not serve the purpose of auditing those found items.
The depth of this crawling and any other options can be set in the ‘Scan configurations’ which we will go over in the next section.
Scan types – Crawl and audit
We can also audit the crawled items directly which will analyse the results and do things like static or dynamic code analysis (based on our settings in the Scan configurations).
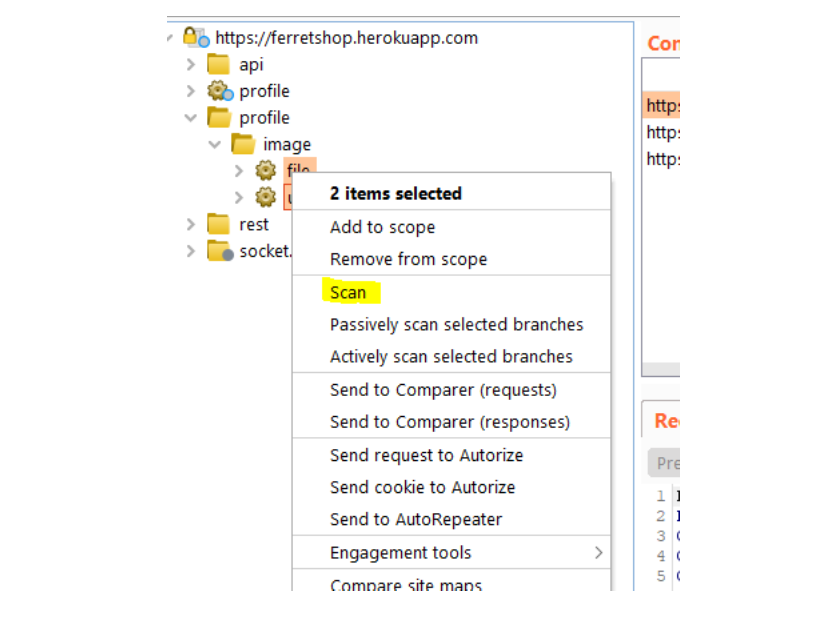
Scan types – Audit selected items
This option is only availble if we select several urls from the sitemap and right click them.
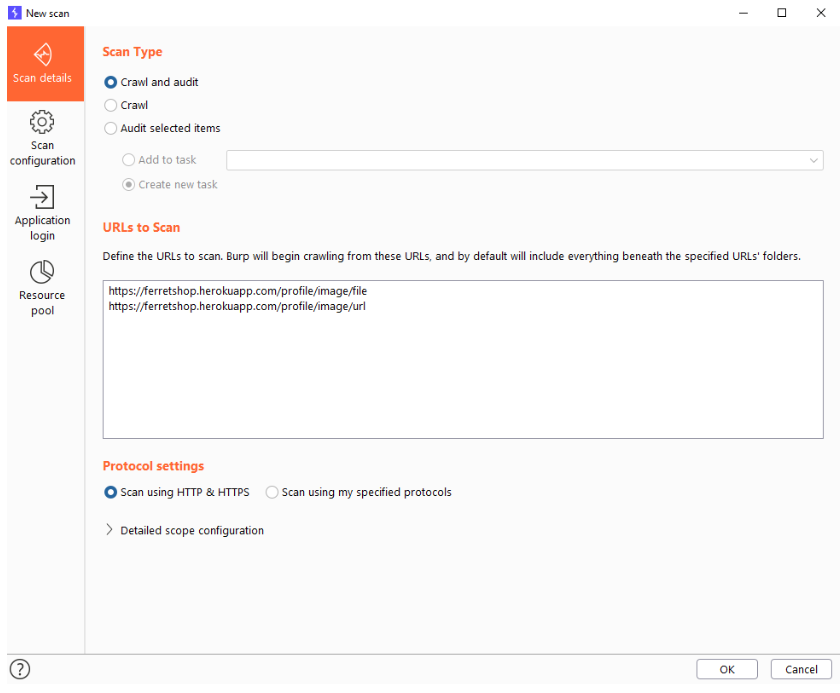
Protocol settings
Here we can define wheter we want to test for both HTTPS and HTTP or if we want to define which protocols to test for.
Scan configurations
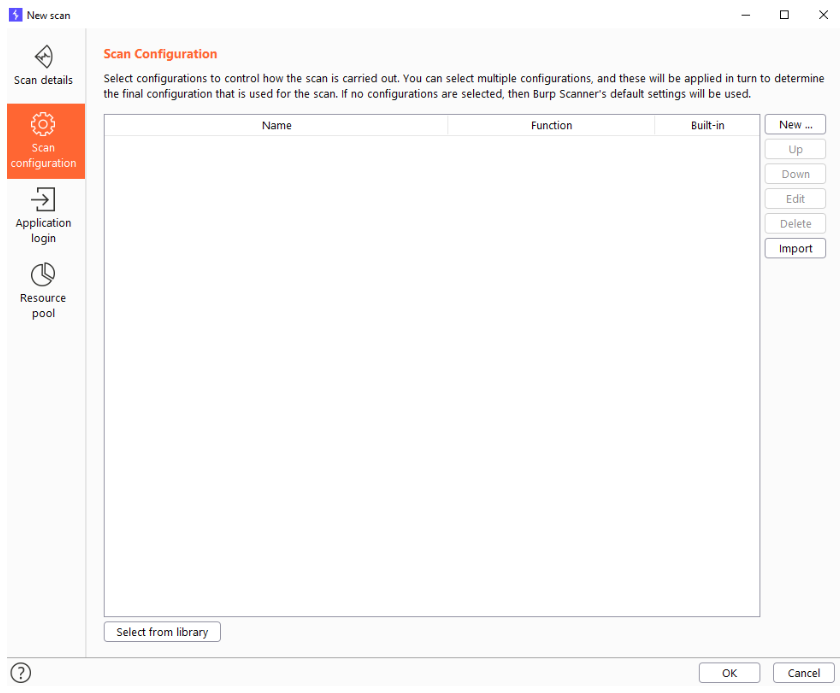
In here we define rules for our scan. Every line in here can consist of one or several rules and can be combined. For example we can choose to do all the audits except for the javascript analysis and also we might want to limit or crawling to 30 minutes max. This can easily be done by adding some built-in rules.

But we can also build our own rules here by pressing the “New…” button. This will give us a choice between crawling and auditing. If you set audit rules on a crawler only jobs, that’s ofcourse not going to have any effect.
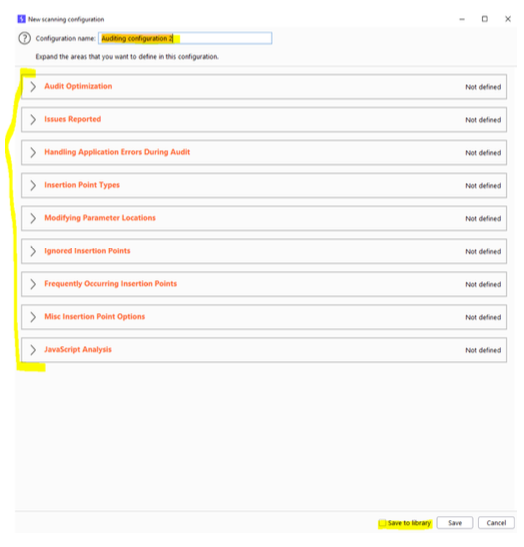
It really pays off to name your rules propperly if you ever want to reuse them. This is a very confusing part and having ambigous names for rulesets can be very confusing.
Next we want to set up the different options we have. If we want to enable a rule, we need to click open the respective section and the rule will automatically be enabled if it is filled in
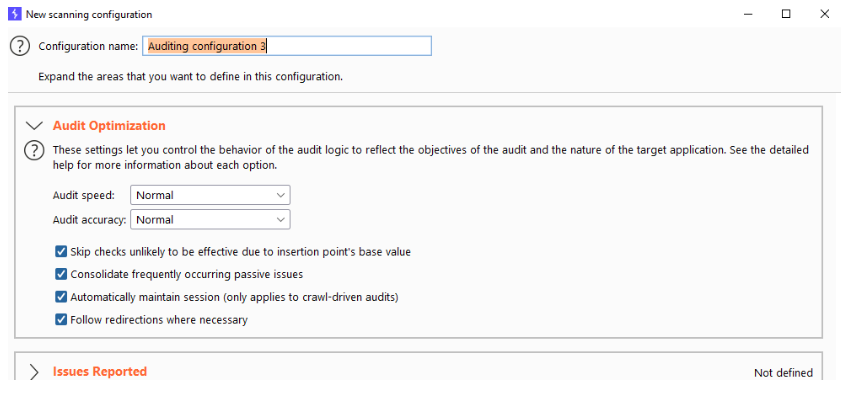
Most of these settings speak for themselves but we will going over each and every one of them in a seperate video so we don’t have to interrupt the flow of the course.
We can also save our rules in the library, this will enable us to reuse them later on.
Application login
Sometimes when crawling, burp will encounter a login screen. If we have credentials available we can enter them here, allowing for an authenticated crawling. This will expose a lot more functionality to us but is not foolproof as burp sometimes doesn’t recognize the login pages, however it is still much better than never being able to crawl a website authenticated.
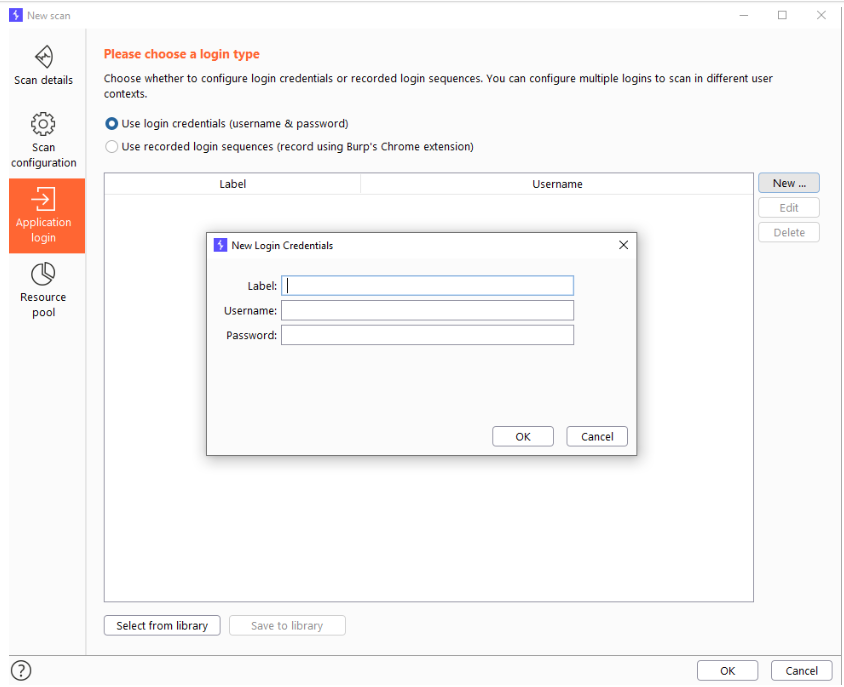
You can give a label to the credentials which are just to make it easier to recognize which credentials you have in front of you.
Resource pool
This allows us to create “resource pools” which are just variables to which we assign a certain value of maximum concurrent requests, delay between those requests and other options.
We can then use specific resource pools for specific jobs

Live task
Live scanning can perform the same auditing actions as the crawling and auditing can do, but this will happen on all the requests you are executing or that are coming in while you are manually exploring the website.
Issue activity + Advisory
When scanning, burp will come across some issues. Whenever it does, it will display them here.
Everything here pretty much speaks for itself and burp will explain things in the “Advisory” section when we click on an issue in the “Issue activity” window.
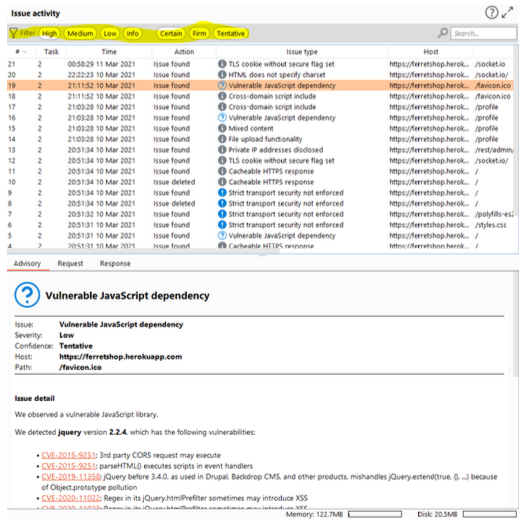
The most useful part here are the filters, they allow us to show specific vulnerability types, making it easier to distinguish between the ones we care about and the ones we do not. I’ve found that almost none of the issues in here are worth it to investigate when i am doing bug bounties.
Leave a Reply